Difference between revisions of "Haydee"
From PCGamingWiki, the wiki about fixing PC games
m (→top: General maintenance with AutoWikiBrowser in Bot mode) |
|||
| (One intermediate revision by one other user not shown) | |||
| Line 25: | Line 25: | ||
|hltb = 40295 | |hltb = 40295 | ||
|igdb = haydee | |igdb = haydee | ||
| − | |mobygames = | + | |mobygames = 80932 |
|strategywiki = | |strategywiki = | ||
|wikipedia = | |wikipedia = | ||
| Line 32: | Line 32: | ||
}} | }} | ||
| − | + | {{Introduction | |
| − | {{ | + | |introduction = |
| + | |||
| + | |release history = | ||
| + | |||
| + | |current state = | ||
| + | }} | ||
'''General information''' | '''General information''' | ||
| Line 49: | Line 54: | ||
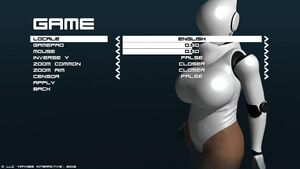
{{Image|Haydee General Settings.jpeg|In-game general settings.}} | {{Image|Haydee General Settings.jpeg|In-game general settings.}} | ||
{{Game data| | {{Game data| | ||
| − | {{Game data/config|Windows|{{p|game}} | + | {{Game data/config|Windows|{{p|game}}\System\*.cfg}} |
}} | }} | ||
===Save game data location=== | ===Save game data location=== | ||
{{Game data| | {{Game data| | ||
| − | {{Game data/saves|Windows|{{p|game}} | + | {{Game data/saves|Windows|{{p|game}}\Profile\{{p|uid}}\Saves\|{{P|game}}\Save\}} |
}} | }} | ||
| Line 77: | Line 82: | ||
==Video== | ==Video== | ||
{{Image|Haydee Video Settings.jpeg|In-game video settings.}} | {{Image|Haydee Video Settings.jpeg|In-game video settings.}} | ||
| − | {{Image|Haydee NVIDIA Surround.jpg|In-game sample using | + | {{Image|Haydee NVIDIA Surround.jpg|In-game sample using NVIDIA Surround at 5960x1080@144Hz}} |
{{Image|Haydee FOV Changed.jpg|In-game sample with a modified FOV. See [[#Field of view (FOV)|Field of view (FOV)]]}} | {{Image|Haydee FOV Changed.jpg|In-game sample with a modified FOV. See [[#Field of view (FOV)|Field of view (FOV)]]}} | ||
| Line 121: | Line 126: | ||
===[[Glossary:Field of view (FOV)|Field of view (FOV)]]=== | ===[[Glossary:Field of view (FOV)|Field of view (FOV)]]=== | ||
{{Fixbox|description=Change FOV|fix= | {{Fixbox|description=Change FOV|fix= | ||
| − | # Go to | + | # Go to {{folder|{{p|game}}\Packs}} folder. |
| − | # Copy {{File|System.pack}} to | + | # Copy {{File|System.pack}} to {{folder|{{p|game}}}}. |
| − | + | # Drag and drop the {{File|System.pack}} onto {{File|unpacker.exe}}. This will automatically generate/create a folder in {{folder|{{p|game}}}} named {{folder|unpacked data}} | |
| − | # Drag and drop the {{File|System.pack}} onto {{File|unpacker.exe}} | + | # Go to {{folder|{{p|game}}\unpacked data\System}} and open the {{File|Game.cfg}} with a text editor. |
| − | + | # Search for <code>zoomfar</code> and change the value to the desired FOV value. | |
| − | # Go to | + | # Search for <code>aimfar</code> and change the value to something appropriate, as it will be the FOV when aiming. |
| − | # Search for <code>zoomfar</code> and change the value to | + | # Close and save the changes. |
| − | # Search for <code>aimfar</code> and change the value to something appropriate, as it will be the FOV | + | # Go back to {{folder|{{p|game}}}} in a separate window or tab in Windows Explorer, to have the {{folder|{{p|game}}}} folder and {{folder|{{p|game}}\unpacked data\System}} folder open next to each other. |
| − | # Close and save the changes | + | # Drag and drop the {{folder|System}} folder onto {{file|packer.exe}} which is situated in {{folder|{{p|game}}}}. |
| − | # | + | # A [[Microsoft Windows#Command Prompt|Command Prompt]] will pop up and it will ask the following: |
| − | # Drag and drop the {{ | + | ## A filename needs to be entered - type <code>System.pack</code> and hit {{key|enter}} (''the first letter must be uppercase'') |
| − | # A [[Microsoft Windows#Command Prompt|Command Prompt]] will pop up and it will ask | + | ## A file priority needs to be entered. Type <code>1</code> and hit {{key|enter}} |
| − | # | + | # Go back to {{folder|{{p|game}}\unpacked data}}, and there should now be a new file named {{File|System.pack}}. |
| − | # | + | # Copy the file to {{folder|{{p|game}}\Packs}} and overwrite the existing file when prompted. |
| − | # Go back to | ||
| − | # Copy the file to | ||
| − | |||
| − | |||
}} | }} | ||
| Line 398: | Line 399: | ||
|windows 32-bit exe = true | |windows 32-bit exe = true | ||
|windows 64-bit exe = false | |windows 64-bit exe = false | ||
| − | |windows arm app = | + | |windows arm app = false |
|windows exe notes = | |windows exe notes = | ||
|macos intel 32-bit app = | |macos intel 32-bit app = | ||
Latest revision as of 11:08, 11 August 2023
 |
|
| Developers | |
|---|---|
| Haydee Interactive | |
| Release dates | |
| Windows | September 26, 2016 |
| Taxonomy | |
| Monetization | One-time game purchase |
| Microtransactions | None |
| Modes | Singleplayer |
| Pacing | Real-time |
| Perspectives | Third-person |
| Controls | Direct control |
| Genres | Action, Platform, Puzzle, Shooter, TPS |
| Art styles | Stylized |
| Themes | Sci-fi |
| Series | Haydee |
| Haydee | |
|---|---|
| Haydee | 2016 |
| Haydee 2 | 2020 |
Haydee is a singleplayer third-person action, platform, puzzle, shooter and TPS game in the Haydee series.
General information
Availability
| Source | DRM | Notes | Keys | OS |
|---|---|---|---|---|
| Humble Store | ||||
| Steam |
Game data
Configuration file(s) location
| System | Location |
|---|---|
| Windows | <path-to-game>\System\*.cfg[Note 1] |
| Steam Play (Linux) | <SteamLibrary-folder>/steamapps/compatdata/530890/pfx/[Note 2] |
Save game data location
| System | Location |
|---|---|
| Windows | <path-to-game>\Profile\<user-id>\Saves\[Note 1] <path-to-game>\Save\[Note 1] |
| Steam Play (Linux) | <SteamLibrary-folder>/steamapps/compatdata/530890/pfx/[Note 2] |
Save game cloud syncing
| System | Native | Notes |
|---|---|---|
| Steam Cloud |
Video
In-game sample with a modified FOV. See Field of view (FOV)
| Graphics feature | State | Notes | |
|---|---|---|---|
| Widescreen resolution | |||
| Multi-monitor | Game scales well across multiple monitors | ||
| Ultra-widescreen | |||
| 4K Ultra HD | |||
| Field of view (FOV) | See Field of view (FOV) | ||
| Windowed | |||
| Borderless fullscreen windowed | See the glossary page for potential workarounds. | ||
| Anisotropic filtering (AF) | |||
| Anti-aliasing (AA) | FXAA | ||
| Vertical sync (Vsync) | |||
| 60 FPS and 120+ FPS | |||
| High dynamic range display (HDR) | See the glossary page for potential alternatives. | ||
Field of view (FOV)
| Change FOV |
|---|
|
Input
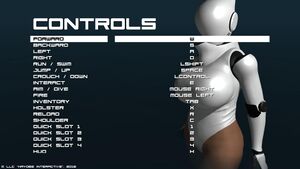
| Keyboard and mouse | State | Notes |
|---|---|---|
| Remapping | ||
| Mouse acceleration | ||
| Mouse sensitivity | ||
| Mouse input in menus | ||
| Mouse Y-axis inversion | ||
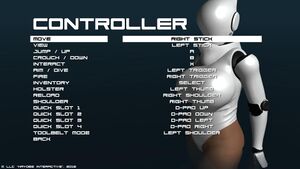
| Controller | ||
| Controller support | ||
| Full controller support | ||
| Controller remapping | ||
| Controller sensitivity | ||
| Controller Y-axis inversion |
| Controller types |
|---|
| XInput-compatible controllers |
|---|
| PlayStation controllers |
|---|
| Generic/other controllers |
|---|
| Additional information | ||
|---|---|---|
| Controller hotplugging | ||
| Haptic feedback | ||
| Digital movement supported | ||
| Simultaneous controller+KB/M |
Audio
| Audio feature | State | Notes |
|---|---|---|
| Separate volume controls | Master, Scene, Game and Background volume sliders | |
| Surround sound | ||
| Subtitles | ||
| Closed captions | ||
| Mute on focus lost | ||
| Royalty free audio |
Localizations
| Language | UI | Audio | Sub | Notes |
|---|---|---|---|---|
| English | ||||
| Simplified Chinese | ||||
| Traditional Chinese | ||||
| Czech | ||||
| Dutch | ||||
| French | ||||
| German | ||||
| Hungarian | ||||
| Italian | ||||
| Japanese | ||||
| Korean | ||||
| Norwegian | ||||
| Polish | ||||
| Brazilian Portuguese | ||||
| Romanian | ||||
| Russian | ||||
| Spanish | ||||
| Ukrainian |
Other information
API
| Technical specs | Supported | Notes |
|---|---|---|
| OpenGL | 3.3 |
| Executable | 32-bit | 64-bit | Notes |
|---|---|---|---|
| Windows |
Middleware
| Middleware | Notes | |
|---|---|---|
| Physics | PhysX |
System requirements
| Windows | ||
|---|---|---|
| Minimum | Recommended | |
| Operating system (OS) | Vista | 7, 8, 10 |
| Processor (CPU) | 2.3 GHz Dual-core | 2.2 GHz Quad-core |
| System memory (RAM) | 2 GB | 4 GB |
| Hard disk drive (HDD) | 1 GB | |
| Video card (GPU) | Nvidia GeForce GTS 450 AMD Radeon HD 6770 | Nvidia GeForce GTX 960 AMD Radeon RX 480 |
- A 64-bit system is required.
Notes
- ↑ 1.0 1.1 1.2 When running this game without elevated privileges (Run as administrator option), write operations against a location below
%PROGRAMFILES%,%PROGRAMDATA%, or%WINDIR%might be redirected to%LOCALAPPDATA%\VirtualStoreon Windows Vista and later (more details). - ↑ 2.0 2.1 Notes regarding Steam Play (Linux) data:
- File/folder structure within this directory reflects the path(s) listed for Windows and/or Steam game data.
- Games with Steam Cloud support may also store data in
~/.steam/steam/userdata/<user-id>/530890/. - Use Wine's registry editor to access any Windows registry paths.
- The app ID (530890) may differ in some cases.
- Treat backslashes as forward slashes.
- See the glossary page for details on Windows data paths.


