Difference between revisions of "Contrast"
From PCGamingWiki, the wiki about fixing PC games
m (updated template usage) |
m (updated template usage) |
||
| Line 36: | Line 36: | ||
==Essential improvements== | ==Essential improvements== | ||
===Skip intro videos=== | ===Skip intro videos=== | ||
| − | {{Fixbox| | + | {{Fixbox|description=Use launch parameter|ref={{cn|date=July 2016}}|fix= |
| − | |||
* Add <code>Menu_CabaretWithoutLogo</code> to the game's launch parameter. Note that there is no dash (-) before the first word. | * Add <code>Menu_CabaretWithoutLogo</code> to the game's launch parameter. Note that there is no dash (-) before the first word. | ||
| Line 103: | Line 102: | ||
===[[Glossary:Field of view (FOV)|Field of view (FOV)]]=== | ===[[Glossary:Field of view (FOV)|Field of view (FOV)]]=== | ||
| − | {{Fixbox| | + | {{Fixbox|description=Use [https://www.flawlesswidescreen.org Flawless Widescreen]|ref={{cn|date=September 2017}}}} |
| − | |||
| − | }} | ||
| − | {{Fixbox| | + | {{Fixbox|description=Set hotkeys in ContrastInput.ini|ref=<ref>[http://www.wsgf.org/dr/contrast/en Contrast | WSGF]</ref>|fix= |
| − | |||
# Open <code>{{p|userprofile}}\Documents\My Games\Contrast\ContrastGame\Config\ContrastInput.ini</code> | # Open <code>{{p|userprofile}}\Documents\My Games\Contrast\ContrastGame\Config\ContrastInput.ini</code> | ||
# Go to <code>[Engine.PlayerInput]</code> and add the following lines with the FOV you want: | # Go to <code>[Engine.PlayerInput]</code> and add the following lines with the FOV you want: | ||
| Line 120: | Line 116: | ||
===[[Glossary:Borderless fullscreen windowed|Borderless fullscreen windowed]]=== | ===[[Glossary:Borderless fullscreen windowed|Borderless fullscreen windowed]]=== | ||
| − | {{Fixbox| | + | {{Fixbox|description=Set borderless windowed|ref={{cn|date=September 2017}}|fix= |
| − | |||
# Install Special K by following the [http://steamcommunity.com/sharedfiles/filedetails/?id=933337066 Special K Unofficial Guide]. | # Install Special K by following the [http://steamcommunity.com/sharedfiles/filedetails/?id=933337066 Special K Unofficial Guide]. | ||
# Start the game and press {{key|Ctrl|Shift|Backspace}} to toggle Special K's Control Panel. | # Start the game and press {{key|Ctrl|Shift|Backspace}} to toggle Special K's Control Panel. | ||
| Line 131: | Line 126: | ||
===[[Glossary:Anisotropic filtering (AF)|Anisotropic filtering (AF)]]=== | ===[[Glossary:Anisotropic filtering (AF)|Anisotropic filtering (AF)]]=== | ||
| − | {{Fixbox| | + | {{Fixbox|description=Set AF manually|ref={{cn|date=September 2017}}|fix= |
| − | |||
# Go to the [[#Game data|configuration file(s) location]]. | # Go to the [[#Game data|configuration file(s) location]]. | ||
# Open <code>ContrastEngine.ini</code>. | # Open <code>ContrastEngine.ini</code>. | ||
| Line 139: | Line 133: | ||
===[[Glossary:Anti-aliasing (AA)|Anti-aliasing (AA)]]=== | ===[[Glossary:Anti-aliasing (AA)|Anti-aliasing (AA)]]=== | ||
| − | {{Fixbox| | + | {{Fixbox|description=Force SGSSAA|ref=<ref>[http://forums.guru3d.com/showthread.php?t=357956 Nvidia Anti-Aliasing Guide - Guru3D.com Forums]</ref>|fix= |
| − | |||
# Download and open [https://ci.appveyor.com/project/Orbmu2k/nvidiaprofileinspector/build/artifacts NVIDIA Profile Inspector]. | # Download and open [https://ci.appveyor.com/project/Orbmu2k/nvidiaprofileinspector/build/artifacts NVIDIA Profile Inspector]. | ||
# Open the Contrast profile. | # Open the Contrast profile. | ||
| Line 151: | Line 144: | ||
===[[Glossary:Vertical sync (Vsync)|Vertical sync (Vsync)]]=== | ===[[Glossary:Vertical sync (Vsync)|Vertical sync (Vsync)]]=== | ||
| − | {{Fixbox| | + | {{Fixbox|description=Disable Vsync|ref=<ref>Tested successfully by [[User:Fwinest JediThug|fwinest JediThug]]</ref>|fix= |
| − | |||
# Go to the [[#Game data|configuration file(s) location]]. | # Go to the [[#Game data|configuration file(s) location]]. | ||
# Open <code>ContrastEngine.ini</code>. | # Open <code>ContrastEngine.ini</code>. | ||
| Line 159: | Line 151: | ||
===[[Glossary:Frame rate (FPS)|High frame rate]]=== | ===[[Glossary:Frame rate (FPS)|High frame rate]]=== | ||
| − | {{Fixbox| | + | {{Fixbox|description=Change frame rate smoothing|ref={{cn|date=July 2016}}|fix= |
| − | |||
# Go to the [[#Game data|configuration file(s) location]]. | # Go to the [[#Game data|configuration file(s) location]]. | ||
# Open <code>ContrastEngine.ini</code>. | # Open <code>ContrastEngine.ini</code>. | ||
| Line 205: | Line 196: | ||
===Mouse smoothing=== | ===Mouse smoothing=== | ||
| − | {{Fixbox| | + | {{Fixbox|description=Modify ContrastInput.ini|ref={{cn|date=July 2016}}|fix= |
| − | |||
# Open <code>{{p|userprofile}}\Documents\My Games\Contrast\ContrastGame\Config\ContrastInput.ini</code> | # Open <code>{{p|userprofile}}\Documents\My Games\Contrast\ContrastGame\Config\ContrastInput.ini</code> | ||
# Go to <code>bEnableMouseSmoothing</code> under the section <code>[Engine.PlayerInput]</code> and change the value to <code>false</code> | # Go to <code>bEnableMouseSmoothing</code> under the section <code>[Engine.PlayerInput]</code> and change the value to <code>false</code> | ||
Revision as of 01:55, 23 November 2017
 |
|
| Developers | |
|---|---|
| Compulsion Games | |
| Publishers | |
| Focus Home Interactive | |
| Engines | |
| Unreal Engine 3 | |
| Release dates | |
| Windows | November 15, 2013 |
General information
Availability
| Source | DRM | Notes | Keys | OS |
|---|---|---|---|---|
| Amazon.com | ||||
| GamersGate | ||||
| Green Man Gaming | ||||
| Steam |
DLC and expansion packs
| Name | Notes | |
|---|---|---|
| Collector's edition | Includes Original Soundtrack and the Programme (Artwork, Dev. Diary). No option to buy seperately.[1] |
Essential improvements
Skip intro videos
| Use launch parameter[citation needed] |
|---|
Notes
|
Game data
Configuration file(s) location
Template:Game data/row
| System | Location |
|---|---|
| Steam Play (Linux) | <SteamLibrary-folder>/steamapps/compatdata/224460/pfx/[Note 1] |
Save game data location
Template:Game data/row
| System | Location |
|---|---|
| Steam Play (Linux) | <SteamLibrary-folder>/steamapps/compatdata/224460/pfx/[Note 1] |
Save game cloud syncing
| System | Native | Notes |
|---|---|---|
| Steam Cloud |
Video settings
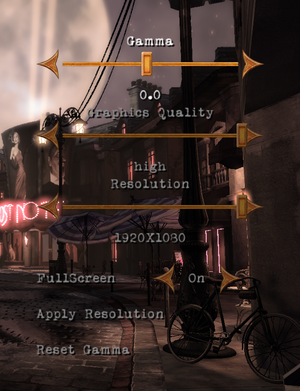
- The game uses graphic presets (low, medium, high) and doesn't offer advanced settings.
Field of view (FOV)
| Use Flawless Widescreen[citation needed] |
|---|
| Set hotkeys in ContrastInput.ini[2] |
|---|
Notes
|
Borderless fullscreen windowed
| Set borderless windowed[citation needed] |
|---|
|
Anisotropic filtering (AF)
| Set AF manually[citation needed] |
|---|
|
Anti-aliasing (AA)
| Force SGSSAA[3] |
|---|
|
Vertical sync (Vsync)
| Disable Vsync[4] |
|---|
|
High frame rate
| Change frame rate smoothing[citation needed] |
|---|
|
Input settings
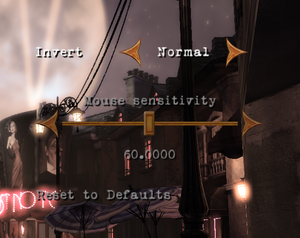
Mouse smoothing
| Modify ContrastInput.ini[citation needed] |
|---|
|
Audio settings
Localizations
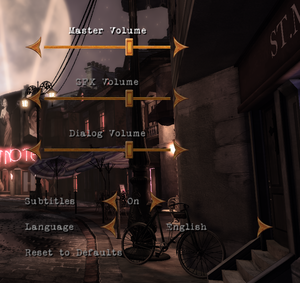
- It's not possible to change language and subtitles seperately.
| Language | UI | Audio | Sub | Notes |
|---|---|---|---|---|
| English | ||||
| French | ||||
| German | ||||
| Italian | ||||
| Polish | ||||
| Brazilian Portuguese | ||||
| Russian | ||||
| Spanish |
VR support
| 3D modes | State | Notes | |
|---|---|---|---|
| Nvidia 3D Vision | See Helix Mod: Contrast. | ||
Other information
API
| Executable | 32-bit | 64-bit | Notes |
|---|---|---|---|
| Windows |
System requirements
| Windows | ||
|---|---|---|
| Minimum | ||
| Operating system (OS) | XP SP2, Vista SP1, 7, 8 | |
| Processor (CPU) | AMD / Intel 2.3 GHz Dual Core | |
| System memory (RAM) | 2 GB | |
| Hard disk drive (HDD) | 4 GB | |
| Video card (GPU) | AMD Radeon X2600 XT Nvidia GeForce 7900 GTX 512 MB of VRAM Shader model 3.0 support |
|
Notes
- ↑ 1.0 1.1 Notes regarding Steam Play (Linux) data:
- File/folder structure within this directory reflects the path(s) listed for Windows and/or Steam game data.
- Games with Steam Cloud support may also store data in
~/.steam/steam/userdata/<user-id>/224460/. - Use Wine's registry editor to access any Windows registry paths.
- The app ID (224460) may differ in some cases.
- Treat backslashes as forward slashes.
- See the glossary page for details on Windows data paths.


