Difference between revisions of "Clive Barker's Undying"
m (→API: Preparing for relatively likely changes to Template:API.) |
|||
| Line 53: | Line 53: | ||
==Essential improvements== | ==Essential improvements== | ||
| − | ===Exemplary | + | ===Exemplary setup of GOG version=== |
{{Fixbox|description=An exemplary way to set the GOG version up for widescreen on modern systems. Other solutions are also possible (see below).|fix= | {{Fixbox|description=An exemplary way to set the GOG version up for widescreen on modern systems. Other solutions are also possible (see below).|fix= | ||
| − | # Download the [https://www.moddb.com/mods/widescreen-high-resolutions/downloads/widescreen-patch-12 Widescreen + High Resolution Patch 1.2], unpack it and paste its | + | # Download the [https://www.moddb.com/mods/widescreen-high-resolutions/downloads/widescreen-patch-12 Widescreen + High Resolution Patch 1.2], unpack it and paste its {{folder|System}} folder to the game folder. Override existing files. |
| − | # Go into the | + | # Go into the {{folder|System§§ folder and delete all files starting with {{code|nglide}}, like {{file|nglide_config.exe}}. |
| − | # Go to | + | # Go to {{folder|{{p|game}}\Help}} and delete or rename {{file|Intro.bik}}. |
| − | # Launch the game and go into the video settings. Check if | + | # Launch the game and go into the video settings. Check if the driver is ''3dfx'' (on the right). If not, click ''change driver''. In the upcoming menu, select ''Show all devices'' and then ''3dfx glide for Windows''. Now run the game with these settings. |
| − | # Now when going into the video menu, | + | # Now when going into the video menu, the driver should show as ''3dfx'' and be able to select a resolution like 1920x1080 (click on the arrows to scroll down). Set graphics to 32 Bit and in the ''Advanced'' tab (on the left) set everything to maximum (but ignore the FPS setting). |
}} | }} | ||
| Line 79: | Line 79: | ||
===Skip intro videos=== | ===Skip intro videos=== | ||
{{Fixbox|description=Delete/rename video file|ref={{cn|date=July 2016}}|fix= | {{Fixbox|description=Delete/rename video file|ref={{cn|date=July 2016}}|fix= | ||
| − | # Go to | + | # Go to {{folder|{{p|game}}\Help}}. |
| − | # Delete or rename | + | # Delete or rename {{file|Intro.bik}}. |
}} | }} | ||
| − | |||
| − | |||
| − | |||
| − | |||
| − | |||
| − | |||
===Subtitles=== | ===Subtitles=== | ||
| Line 174: | Line 168: | ||
{{Fixbox|description=Set custom FOV|ref={{cn|date=July 2016}}|fix= | {{Fixbox|description=Set custom FOV|ref={{cn|date=July 2016}}|fix= | ||
# Press {{key|Tab}} while playing. | # Press {{key|Tab}} while playing. | ||
| − | # Type in and enter <code>fov x</code> (replace x with | + | # Type in and enter <code>fov x</code> (replace x with the desired FOV). |
#* To match the original FOV, use <code>100.3</code> (16:10), <code>106.2</code> (16:9), or <code>121.1</code> (21:9). | #* To match the original FOV, use <code>100.3</code> (16:10), <code>106.2</code> (16:9), or <code>121.1</code> (21:9). | ||
}} | }} | ||
| Line 191: | Line 185: | ||
===[[Glossary:Vertical sync (Vsync)|Vertical sync (Vsync)]]=== | ===[[Glossary:Vertical sync (Vsync)|Vertical sync (Vsync)]]=== | ||
{{Fixbox|description=Enable Vsync|ref={{cn|date=July 2016}}|fix= | {{Fixbox|description=Enable Vsync|ref={{cn|date=July 2016}}|fix= | ||
| − | # Go to | + | # Go to {{folder|{{p|game}}\System}}. |
| − | # Open | + | # Open {{file|System.ini}}. |
# Change <code>UseVSync=False</code> to <code>UseVSync=True</code>. | # Change <code>UseVSync=False</code> to <code>UseVSync=True</code>. | ||
| − | # Save | + | # Save the changes. |
}} | }} | ||
| − | |||
| − | |||
| − | |||
==Input== | ==Input== | ||
| Line 344: | Line 335: | ||
==Issues fixed== | ==Issues fixed== | ||
| − | + | ===Disable mouse acceleration=== | |
| − | ===Disable | ||
{{Fixbox|description=Enable DirectInput|fix= | {{Fixbox|description=Enable DirectInput|fix= | ||
| − | # Go to | + | # Go to {{folder|{{p|game}}\System}}. |
# Download and extract [https://github.com/elishacloud/dinputto8/releases/latest/download/dinput.zip dinput.dll] to System folder | # Download and extract [https://github.com/elishacloud/dinputto8/releases/latest/download/dinput.zip dinput.dll] to System folder | ||
| − | # Open | + | # Open {{file|System.ini}}. |
# Change <code>UseDirectInput=False</code> to <code>UseDirectInput=True</code>. | # Change <code>UseDirectInput=False</code> to <code>UseDirectInput=True</code>. | ||
}} | }} | ||
| Line 355: | Line 345: | ||
==="3d hardware initialization failed" error=== | ==="3d hardware initialization failed" error=== | ||
{{Fixbox|description=Use dgVoodoo|ref=<ref name="2017-09-07">{{Refcheck|user=Keith|date=2017-09-07|comment=}}</ref>|fix= | {{Fixbox|description=Use dgVoodoo|ref=<ref name="2017-09-07">{{Refcheck|user=Keith|date=2017-09-07|comment=}}</ref>|fix= | ||
| − | # Download | + | # Download [[dgVoodoo 2]]. |
| − | # | + | # Extract {{file|dgVoodooCpl.exe}} and the contents of the {{folder|MS\x86}} subfolder to {{folder|{{p|game}}\System}}. |
| − | # Run | + | # Run {{file|dgVoodooCpl.exe}}. |
# Click on '''Add''' and select the installation folder. | # Click on '''Add''' and select the installation folder. | ||
# Disable '''Capture mouse''' in the General tab. | # Disable '''Capture mouse''' in the General tab. | ||
| Line 373: | Line 363: | ||
See [[#"3d hardware initialization failed" error|"3d hardware initialization failed" error]] to fix. | See [[#"3d hardware initialization failed" error|"3d hardware initialization failed" error]] to fix. | ||
}} | }} | ||
| + | |||
{{Fixbox|description=Use DDrawCompat|ref=<ref>https://github.com/narzoul/DDrawCompat</ref>|fix= | {{Fixbox|description=Use DDrawCompat|ref=<ref>https://github.com/narzoul/DDrawCompat</ref>|fix= | ||
# Download [https://github.com/narzoul/DDrawCompat/releases/ DDrawCompat]. | # Download [https://github.com/narzoul/DDrawCompat/releases/ DDrawCompat]. | ||
| − | # Extract the contents from the <code>.zip</code> file into | + | # Extract the contents from the <code>.zip</code> file into {{folder|{{p|game}}\System}}. |
}} | }} | ||
===No mouse access with ReShade=== | ===No mouse access with ReShade=== | ||
{{Fixbox|description=Rename ReShade files|ref=<ref>{{Refurl|url=https://reshade.me/forum/troubleshooting/4004-max-payne-1-cursor-stuck-in-middle#27962|title=ReShade Forum - Max Payne 1 - cursor stuck in middle|date=2020-01-27}}</ref>|fix= | {{Fixbox|description=Rename ReShade files|ref=<ref>{{Refurl|url=https://reshade.me/forum/troubleshooting/4004-max-payne-1-cursor-stuck-in-middle#27962|title=ReShade Forum - Max Payne 1 - cursor stuck in middle|date=2020-01-27}}</ref>|fix= | ||
| − | # Rename | + | # Rename {{file|dxgi.dll}} and {{file|dxgi.ini}} to {{file|dinput.dll}} and {{file|dinput.ini}}, respectively. |
}} | }} | ||
===Game runs to fast/Cutscenes are too fast cutting off characters voice lines=== | ===Game runs to fast/Cutscenes are too fast cutting off characters voice lines=== | ||
| − | {{Fixbox|description=Cap the framerate to | + | {{Fixbox|description=Cap the framerate to 60 FPS|ref={{cn|date=September 2021}}}} |
| − | {{Fixbox|description=Set monitor | + | {{Fixbox|description=Set monitor refresh rate to 60 Hz|ref={{cn|date=July 2020}}}} |
===White borders appearing=== | ===White borders appearing=== | ||
| Line 392: | Line 383: | ||
===Black screen on startup=== | ===Black screen on startup=== | ||
{{Fixbox|description=Change sound settings|ref=<ref>https://www.gog.com/forum/clive_barkers_undying/game_wont_start</ref>|fix= | {{Fixbox|description=Change sound settings|ref=<ref>https://www.gog.com/forum/clive_barkers_undying/game_wont_start</ref>|fix= | ||
| − | # | + | # Open the file {{file|{{p|game}}\System\System.ini}} in a text editor. |
| − | # Search for GalaxyAudio | + | # Search for {{code|GalaxyAudio}}. |
| − | # Set UseDirectSound=False | + | # Set {{code|UseDirectSound=False}} |
| − | # Set Use3dHardware=True | + | # Set {{code|Use3dHardware=True}} |
| − | # Save | + | # Save the changes and exit. |
}} | }} | ||
| Line 504: | Line 495: | ||
|recVRAM = 32 MB | |recVRAM = 32 MB | ||
}} | }} | ||
| + | |||
| + | ===DirectX 11 additional improvements=== | ||
| + | * [https://www.moddb.com/mods/unreal-directx11-renderer-for-ut-ug-rune-and-dx DirectX 11 Renderer]. The renderer itself. | ||
| + | * [https://www.moddb.com/mods/normal-and-height-maps-for-clive-barkers-undying Normal and height maps for Clive Barker's Undying]. Provides normal mapping and height maps for Parallax Occlusion. | ||
| + | * [https://www.moddb.com/mods/clive-barkers-undying-esrgan-pack Clive Barker's Undying ESRGAN Pack]. AI Upscaled vanilla textures. Compatible with normal and height maps, Texture Updater (Detail textures) and mods like Undying Renewal. There are some minor issues with decals, but overall its playable. | ||
| + | {{--}} If using a widescreen patch with DirectX 11 renderer, the hands/weapons are cut off at the bottom and Coronas need to be disabled in the renderer settings or they will be misaligned. | ||
{{System requirements | {{System requirements | ||
Revision as of 12:44, 14 April 2023
 |
|
| Developers | |
|---|---|
| DreamWorks Interactive | |
| Mac OS (Classic) | Westlake Interactive |
| macOS (OS X) | Westlake Interactive |
| Publishers | |
| Electronic Arts | |
| Retail re-release | Sold Out Software |
| Mac OS | Aspyr Media |
| OS X | Aspyr Media |
| Engines | |
| Unreal Engine 1 | |
| Release dates | |
| Windows | February 21, 2001 |
| Mac OS (Classic) | June 12, 2002 |
| macOS (OS X) | June 12, 2002 |
| Reception | |
| Metacritic | 85 |
| Taxonomy | |
| Monetization | One-time game purchase |
| Modes | Singleplayer |
| Pacing | Real-time |
| Perspectives | First-person |
| Controls | Direct control |
| Genres | FPS, Survival horror, Immersive sim, Shooter |
| Art styles | Realistic |
| Themes | Horror, Supernatural, Interwar, Europe, Fantasy |
| Series | Clive Barker |
| Clive Barker | |
|---|---|
| Clive Barker's Undying | 2001 |
| Clive Barker's Jericho | 2007 |
General information
Availability
Demo
A demo is available here.
Essential improvements
Exemplary setup of GOG version
{{Fixbox|description=An exemplary way to set the GOG version up for widescreen on modern systems. Other solutions are also possible (see below).|fix=
- Download the Widescreen + High Resolution Patch 1.2, unpack it and paste its
Systemfolder to the game folder. Override existing files. - Go into the
System§§ folder and delete all files starting withnglide, likenglide_config.exe. - Go to
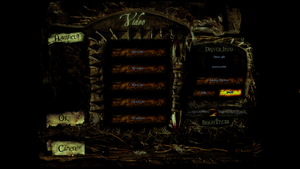
<path-to-game>\Helpand delete or renameIntro.bik. - Launch the game and go into the video settings. Check if the driver is 3dfx (on the right). If not, click change driver. In the upcoming menu, select Show all devices and then 3dfx glide for Windows. Now run the game with these settings.
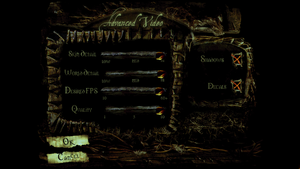
- Now when going into the video menu, the driver should show as 3dfx and be able to select a resolution like 1920x1080 (click on the arrows to scroll down). Set graphics to 32 Bit and in the Advanced tab (on the left) set everything to maximum (but ignore the FPS setting).
Patches
- Texture Patch fixes issues with some textures (already present in the GOG.com version).
Texture Updater
- Texture Updater updates original textures with detail textures to improve image quality.
Widescreen + High Resolution Patch 1.2
- Includes a fix for Widescreen Resolutions with FOV automatically calculated based on the current resolution.
- Adds more resolutions to Video options, supporting high resolutions.
- Includes dgvoodoo2 already set for supporting both Direct3D and Glide renderers.
- Journal scales properly.
Peixoto's patch
Peixoto's patch Forced resolution allows high resolution without shrinking the HUD\menus.
Skip intro videos
| Delete/rename video file[citation needed] |
|---|
|
Subtitles
- Official subtitle support only covers 40% of the game, but unofficial patches provide complete subtitles for all dialog, scripted or otherwise.[3] Such patches can be found in the localizations section.
- Compatible with other mods and enhancements.
- Patch three files (CreatureSFX.uax, LevelMechanics.uax, Voiceover.uax) so backup them just in case.
- The unofficial patches only provide full support for one language at a time, there is no patch to provide full support for all available languages.[4]
Game data
Configuration file(s) location
| System | Location |
|---|---|
| Windows | <path-to-game>\System\*.ini[Note 2] |
| macOS (OS X) |
Save game data location
| System | Location |
|---|---|
| Windows | <path-to-game>\Save\[Note 2] |
| macOS (OS X) |
Save game cloud syncing
| System | Native | Notes |
|---|---|---|
| GOG Galaxy |
Video
| Graphics feature | State | WSGF | Notes |
|---|---|---|---|
| Widescreen resolution | Non-4:3 resolutions are stretched unless external fix is used. See Widescreen Patch 1.2. | ||
| Multi-monitor | |||
| Ultra-widescreen | See Widescreen Patch 1.2. | ||
| 4K Ultra HD | See Widescreen Patch 1.2 | ||
| Field of view (FOV) | See Field of view (FOV). | ||
| Windowed | Toggle with Alt+↵ Enter. | ||
| Borderless fullscreen windowed | See Borderless fullscreen windowed. | ||
| Anisotropic filtering (AF) | See the glossary page for potential workarounds. | ||
| Anti-aliasing (AA) | See the glossary page for potential workarounds. | ||
| Vertical sync (Vsync) | See the glossary page for potential workarounds. | ||
| 60 FPS | 3dfx Glide rendering is capped at 62.5 FPS. | ||
| 120+ FPS | +60fps breaks cutscenes, they advance too quickly and cut off voice overs. See (Direct3D only) - https://steamcommunity.com/sharedfiles/filedetails/?id=2048525175 (only changing 0AD7A33B to 00000000 needed). | ||
Field of view (FOV)
- The default FOV is 90° when outputting a 4:3 image.
- Handled Automatically by Widescreen Patch 1.2.
| Set custom FOV[citation needed] |
|---|
|
Borderless fullscreen windowed
| Force borderless fullscreen (nGlide)[citation needed] |
|---|
|
Vertical sync (Vsync)
| Enable Vsync[citation needed] |
|---|
|
Input
| Keyboard and mouse | State | Notes |
|---|---|---|
| Remapping | ||
| Mouse acceleration | Forced on in Windows Mouse Properties. Can be disabled using this fix. | |
| Mouse sensitivity | ||
| Mouse input in menus | ||
| Mouse Y-axis inversion | ||
| Controller | ||
| Controller support |
| Controller types |
|---|
Audio
| Audio feature | State | Notes |
|---|---|---|
| Separate volume controls | Ambient, effects, voices | |
| Surround sound | Up to 7.0 with Creative ALchemy | |
| Subtitles | Unofficial patches provide complete support for the English, Spanish, Italian, and German languages. | |
| Closed captions | ||
| Mute on focus lost | ||
| EAX support | EAX 1.0. | |
| Royalty free audio |
- May require DirectSound3D restoration software to restore proper audio functionality on Windows Vista and later.
Localizations
| Language | UI | Audio | Sub | Notes |
|---|---|---|---|---|
| English | Use the English Subtitles patch for full support. Installer version here. | |||
| French | Retail only; download for GOG.com version. | |||
| German | Fan translation; download. | |||
| Italian | Fan translation; download 1 and download 2. | |||
| Japanese | Retail only. | |||
| Russian | Retail only. | |||
| Spanish | Fan translation; download 1, download 2, and download 3. |
Issues fixed
Disable mouse acceleration
| Enable DirectInput |
|---|
|
"3d hardware initialization failed" error
| Use dgVoodoo[5] |
|---|
|
Windows 8 low frame rate in fullscreen
| Use dgVoodoo[5] |
|---|
|
See "3d hardware initialization failed" error to fix. |
Gamma doesn't work on Windows 8 and later
| Use dgVoodoo[5] |
|---|
|
See "3d hardware initialization failed" error to fix. |
| Use DDrawCompat[6] |
|---|
|
No mouse access with ReShade
| Rename ReShade files[7] |
|---|
|
Game runs to fast/Cutscenes are too fast cutting off characters voice lines
| Cap the framerate to 60 FPS[citation needed] |
|---|
| Set monitor refresh rate to 60 Hz[citation needed] |
|---|
White borders appearing
When using the Scrye spell or after some cutscenes, the screen gets outlined in white under certain conditions. This can be ended by going to the pause menu.[8] One way to prevent this is using the Widescreen Patch with dgVoodoo, e.g. like this.
Black screen on startup
| Change sound settings[9] |
|---|
|
VR support
| 3D modes | State | Notes | |
|---|---|---|---|
| vorpX | G3D G3D using the DX11 renderer mentioned above.User created game profile, see vorpx forum profile introduction. |
||
Other information
API
- An in depth comparison of the Glide and Direct3D renderers can be found on the GOG forums. Of note is that Direct3D takes advantage of 32-bit assets, but Glide has more accurate and variable lighting and shadows.
| Technical specs | Supported | Notes |
|---|---|---|
| Direct3D | 7, 11 | DirectX 11 is hackable with https://www.moddb.com/mods/unreal-directx11-renderer-for-ut-ug-rune-and-dx |
| Glide | 2 | |
| Software renderer |
| Executable | PPC | 16-bit | 32-bit | 64-bit | Notes |
|---|---|---|---|---|---|
| Windows | |||||
| macOS (OS X) | |||||
| Mac OS (Classic) |
System requirements
| Windows | ||
|---|---|---|
| Minimum | Recommended | |
| Operating system (OS) | 95 OSR2 | 98, ME, XP |
| Processor (CPU) | Intel Pentium II 400 MHz | Intel Pentium III 500 MHz |
| System memory (RAM) | 64 MB | 128 MB |
| Hard disk drive (HDD) | 90 MB | 610 MB |
| Video card (GPU) | 16 MB of VRAM DirectX 9.0c compatible | 32 MB of VRAM |
DirectX 11 additional improvements
- DirectX 11 Renderer. The renderer itself.
- Normal and height maps for Clive Barker's Undying. Provides normal mapping and height maps for Parallax Occlusion.
- Clive Barker's Undying ESRGAN Pack. AI Upscaled vanilla textures. Compatible with normal and height maps, Texture Updater (Detail textures) and mods like Undying Renewal. There are some minor issues with decals, but overall its playable.
- If using a widescreen patch with DirectX 11 renderer, the hands/weapons are cut off at the bottom and Coronas need to be disabled in the renderer settings or they will be misaligned.
| Mac OS | ||
|---|---|---|
| Minimum | Recommended | |
| Operating system (OS) | 8.6 | 9.x, 10.1 |
| Processor (CPU) | PowerPC G3 400 MHz | PowerPC G3/G4 500 MHz |
| System memory (RAM) | 96 MB | 128 MB |
| Hard disk drive (HDD) | 600 MB | |
| Video card (GPU) | ATI Rage 128 16 MB of VRAM | Nvidia GeForce2 MX ATI Radeon 7500 32 MB of VRAM |
Notes
- ↑ SafeDisc retail DRM does not work on Windows 10[1] or Windows 11 and is disabled by default on Windows Vista, Windows 7, Windows 8, and Windows 8.1 when the KB3086255 update is installed.[2]
- ↑ 2.0 2.1 When running this game without elevated privileges (Run as administrator option), write operations against a location below
%PROGRAMFILES%,%PROGRAMDATA%, or%WINDIR%might be redirected to%LOCALAPPDATA%\VirtualStoreon Windows Vista and later (more details).
References
- ↑ Not Loading in Windows 10; this will break thousands of - Microsoft Community - last accessed on 2017-01-16
- ↑ Microsoft - MS15-097: Description of the security update for the graphics component in Windows: September 8, 2015 - last accessed on 2018-02-16
- ↑ No subtitles?, page 1 - Forum - GOG.com
- ↑ No subtitles?, page 6 - Forum - GOG.com
- ↑ 5.0 5.1 5.2 Verified by User:Keith on 2017-09-07
- ↑ https://github.com/narzoul/DDrawCompat
- ↑ ReShade Forum - Max Payne 1 - cursor stuck in middle - last accessed on 2020-01-27
- ↑ https://www.gog.com/forum/clive_barkers_undying/border_around_screen
- ↑ https://www.gog.com/forum/clive_barkers_undying/game_wont_start


