Anonymous edits have been disabled on the wiki. If you want to contribute please login or create an account.

Deus Ex: Invisible War

From PCGamingWiki, the wiki about fixing PC games
Deus Ex: Invisible War
Deus Ex: Invisible War cover
Developers
Ion Storm
Publishers
2003-2009 Eidos Interactive
2009-2023 Square Enix
2023-present Eidos-Montréal
Re-release Sold Out Software
Engines
Unreal Engine 2
Release dates
Windows December 2, 2003[1]
Reception
Metacritic 80
Taxonomy
Monetization One-time game purchase
Modes Singleplayer
Pacing Real-time
Perspectives First-person
Controls Direct control
Genres Immersive sim, Shooter, Stealth
Art styles Realistic
Themes Antarctica, Cyberpunk, Egypt, Europe, North America, Sci-fi
Series Deus Ex
Deus Ex: Invisible War on HowLongToBeat
Deus Ex: Invisible War on IGDB
Deus Ex: Invisible War on MobyGames
Deus Ex: Invisible War on Wikipedia
Deus Ex
Deus Ex 2000
Deus Ex: Invisible War 2003
Deus Ex: Human Revolution 2011
Deus Ex: Human Revolution - Director's Cut 2013
Deus Ex: The Fall 2014
Deus Ex: Revision (unofficial mod) 2015
Deus Ex: Mankind Divided 2016
Deus Ex: Breach 2017
Deus Ex: Mankind Divided - VR Experience 2017
Deus Ex GO 2017

Deus Ex: Invisible War is a singleplayer first-person immersive sim, shooter and stealth game in the Deus Ex series.

General information

Sometimes referred to as Deus Ex 2: Invisible War[2] or simply Deus Ex 2.
GOG.com Community Discussions for game series
GOG.com Support Page
Steam Community Discussions

Availability

Source DRM Notes Keys OS
Retail
Disc check (requires the CD/DVD in the drive to play)
SecuROM 4 DRM disc check. Patch 1.2 uses SecuROM 5 DRM.
Windows
Amazon.com
Icon overlay.png
Windows
GOG.com
DRM-free
Includes: Manual (pdf), 2 wallpapers in 4 resolutions (jpg), soundtrack (14 tracks, mp3), developer's commentary (7:34 Min. Video, wmv), 2 avatars (jpg), and 24 artworks (jpg).
Windows
Green Man Gaming
Icon overlay.png
Windows
Humble Store
Icon overlay.png
Windows
Steam
Icon overlay.png
Windows
Publisher website (unavailable)
Icon overlay.png
Windows
Games for Windows Marketplace (unavailable)
Icon overlay.png
[3]
Windows
A free demo version is available from GameFront.

Essential improvements

Patches

The v1.2 Patch updates North American retail versions to the latest version. Digital distribution and European retail versions already have this patch.

Visible Upgrade: Unofficial patch for Deus Ex 2

Requires v1.2 Patch to be installed for North American retail version.
Fixes many issues encountered on modern systems.
Additional tweaks available such as FoV adjustment, HUD options, custom aspect ratios and other display tweaks.
If you're having frame rate issues with this mod, check this fix.
Full version includes John P's Deus Ex Unified Texture Pack as option during installation. VisibleTweaker.exe offers a way to toggle on/off certain parts of the mod.

Skip intro videos

Use Visible Upgrade: Unofficial patch for Deus Ex 2 and set No Intro Movies via VisibleTweaker.exe in Tweaks section[citation needed]

John P's Deus Ex Unified Texture Pack

Improves textures and models for most of the game's assets and is a compilation of a variety of mods into a single installer.
The GOG.com version of Invisible War is treated as the UK version. The Unified Texture Pack's installer will need to be set to UK to work.

ESRGAN Texture Pack

AI upscaled textures & cinematics for Deus Ex: Invisible War.
Not only all the textures upscaled, but also modified MatLib (material library) file included to add or restore normal maps for all the materials lacking them.
Requires Visible Upgrade: Unofficial patch for Deus Ex 2 to play.
ESRGAN Pack competes with John P's Deus Ex Unified Texture Pack so choose one. It retains more upscaled vanilla look to the game but contains valuable MatLib upgrade which improve visual a lot by adding a lot of normal maps.
if you want to use John P's texture pack with the ESRGAN Pack, then install the ESRGAN pack first, and then Install John P's pack, overwriting the files. If you use Visible Upgrade, extract the pack to %PROGRAMDATA% and don't overwrite any files.

Deus Ex 2 High Res Fonts by djdarko

Improves the game's fonts.
Requires the Visible Upgrade.

Large Address Aware

Improves stability when using texture mods by allowing the application to use more than 2GB RAM. This can help prevent crashes. If using the Visible Upgrade, apply LAA to <path-to-game>\System\DX2Main.exe and <path-to-game>\System\DeusEx2Launcher.exe, otherwise apply it to <path-to-game>\System\DX2.exe.

Game data

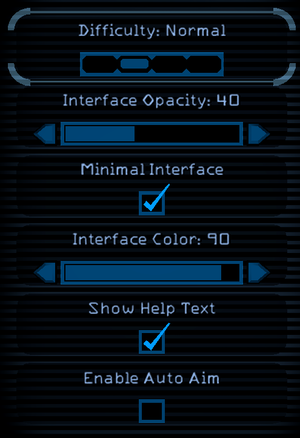
Game settings.
Game settings.

Configuration file(s) location

System Location
Windows %USERPROFILE%\Documents\Deus Ex - Invisible War\user.ini
Steam Play (Linux) <Steam-folder>/steamapps/compatdata/6920/pfx/[Note 1]

Save game data location

System Location
Windows %USERPROFILE%\Documents\Deus Ex - Invisible War\SaveGames\
Steam Play (Linux) <Steam-folder>/steamapps/compatdata/6920/pfx/[Note 1]

Save game cloud syncing

System Native Notes
GOG Galaxy
OneDrive
Requires enabling backup of the Documents folder in OneDrive on all computers.
Steam Cloud

Video

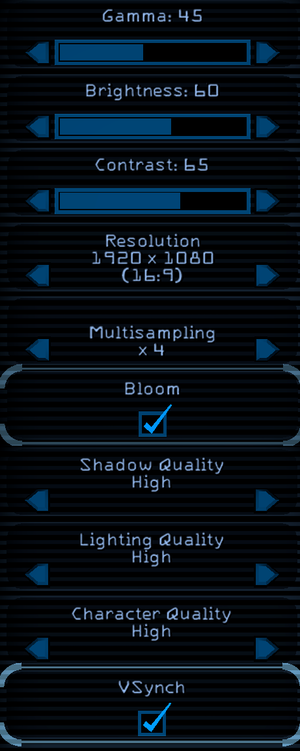
Video settings.
Video settings.

Graphics feature State WSGF Notes
Widescreen resolution
Use Visible Upgrade.
Multi-monitor
Use Visible Upgrade.
Ultra-widescreen
Use Visible Upgrade.
4K Ultra HD
Use Visible Upgrade.
Field of view (FOV)
Use Visible Upgrade.
Windowed
Use Visible Upgrade.
Borderless fullscreen windowed
Anisotropic filtering (AF)
See the glossary page for potential workarounds.
Anti-aliasing (AA)
MSAA
Vertical sync (Vsync)
Double Buffer
60 FPS
120+ FPS
At high frame rates, such as 100+, the physics of objects in-game are sped up the higher the frame rate.

Ambient occlusion (AO)

Applying ambient occlusion (AO) through third-party solutions may not work properly because the game constantly resizes the depth buffer when moving the camera.
Use a third-party ambient occlusion solution:
  1. Open one of the below files:
  2. Find the lines for StaticVPScale and DynVPScale. Set both values to 100, then save the file. To prevent the game from overwriting the file, also set the file to read-only. This prevents the game from resizing the depth buffer.[4]
  3. Enable a third-party ambient occlusion solution:
    • Use Nvidia Profile Inspector to force HBAO+ with the Ambient Occlusion compatibility set to 0x00000003 (without dgVoodoo 2) or 0x00060000 (with dgVoodoo2).[4]
      • If using dgVoodoo 2, its General > Output API must also be set to Direct3D 11 (feature level 11.0).
    • Use ReShade to force MXAO or another depth buffer based ambient occlusion shader:
      1. Make sure to have dgVoodoo 2 set up as explained here.
      2. In-game, open the Reshade UI and click the Edit global preprocessor definitions button.
      3. Ensure that the value RESHADE_DEPTH_MULTIPLIER exists and is set to 2 as this is required for Reshade to register the depth buffer correctly.

Input

Input settings.
Input settings.
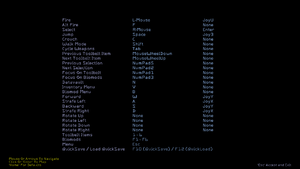
Remap settings.
Remap settings.

Keyboard and mouse State Notes
Remapping
Toolbelt (keys 1 to 6), Biomods (keys F1 to F6), Quicksave (F10) and Quickload (F12) can not be rebound through game menu, only by editing the \Options\Options.ini file.
Mouse acceleration
Mouse sensitivity
Mouse input in menus
Mouse Y-axis inversion
Controller
Controller support
Full controller support
See Controller support.
Controller remapping
Some buttons/axes may not be recognised out-of-box.
Controller sensitivity
Controller Y-axis inversion
Controller types
XInput-compatible controllers
See Controller support.
Xbox button prompts
Impulse Trigger vibration
PlayStation controllers
Generic/other controllers
Additional information
Controller hotplugging
Haptic feedback
Use XInputPlus and set Enable ForceFeedBack Emulation.
Digital movement supported
Simultaneous controller+KB/M

Controller support

This fix makes Xinput controllers fully navigatable in menus. The game already has out-of-box controller support, However it isn't fully compatible with Xinput controllers. This fix will makes the game mostly compatible.
Set up Xinput Plus
  1. Download Xinput Plus.
  2. Open XinputPlus.exe.
  3. Go to the DirectInput tab and check enable directinput.
  4. Assign Right Stick to Z axis/z Rot.
  5. Assign DPAD to POV.
  6. Assign LT/RT to Button 11/Button12.
  7. Select <path-to-game>/system/DX2.exe as Target Program and hit apply.
  8. Go to Documents/Deus ex invisible war and Open user.ini.
  9. Change Joy8=NoneEnter to joy8=MenuF22.
  10. Set your write file permission to deny for all users for user.ini.
If using Visible Upgrade, Edit the Options.ini file in %USERPROFILE%/Documents/Deus Ex Invisible War/Options.

Audio

Audio settings.
Audio settings.

Audio feature State Notes
Separate volume controls
Speech, Music, Sound effects
Surround sound
Up to 7.0 output with DirectSound3D restoration software.[5]
Subtitles
Closed captions
Mute on focus lost
EAX support
DirectSound3D.
Royalty free audio
Requires DSOAL v1.1. Using later versions of DSOAL will cause game to crash on startup.

Localizations

Language UI Audio Sub Notes
English
German
Retail only. Patch for digital release here.
French
Retail only.
Italian
Retail only.
Polish
Retail only, patch for digital release here.
Brazilian Portuguese
Fan translation, download.
Spanish
Retail only. Patch for digital release here.

VR support

3D modes State GG3D Notes
Native 3D
Nvidia 3D Vision

Issues unresolved

Crash when installed in a Storage Space

The game will refuse to run when installed on a drive which is managed as a storage space on Windows 8 and later. Specifically, the content\DX2\Maps folder must not be on a Storage Space.

Game not restoring user's calibration profile

Game may not restoring calibrated values from monitor on some system, even with Use legacy display ICC colour management set in compatibility setting. using dgVoodoo2 to make the game inherit display ICC profile also does not work.[6]

Issues fixed

Temporary switch to desktop or black screen when loading

Invisible War temporarily shows the desktop or a black screen prior to the loading screen. The game still works despite this.
Use Visible Upgrade[7]

Low FPS / Game not using GPU

Fix for Windows 8 or later[citation needed]
  1. Makes sure you have installed the Visible Upgrade patch.
  2. Download dgVoodoo2.
  3. Extract D3D8.dll from the Archive into the game's executable directory. (%Archive%/MS/x86/)
  4. Extract dgVoodooCpl.exe and dgVoodoo.conf into the game's directory as well.
  5. Run dgVoodooCpl.exe, under the general tab, set the adapter the GPU you wish to use.
  6. Close the program and run the game.

Game hangs when loading

Analyse wait chain[8][9]
  1. Open Task Manager.
  2. Find DX2Main.exe (DeusEx2.exe if you are using the Visible Upgrade pack) on the list and expand it.
  3. Right-click on every child object that belongs to the process and click on "Go to details".
  4. In the Details tab, right-click on the highlighted element and click on "Analyse Wait Chain".
  5. If there are elements on the list, select them and kill the process.

Notes:

Most common programs causing issues are logitechg_discord.exe (Discord applet for Logitech Gaming Software),Setpoint.exe (program of Logitech), Magnetengine.exe (Part of the Viveport VR suite) and nvcontainer.exe (part of Nvidia Experience).
If you do not want to do this process every time you start the game, you must simply deactivate the conflicting process or uninstall the program from the conflicting process.

Mouse does not move in menu, inventory, etc.

Windows 10 (and earlier?) desktop scaling prevents mouse from moving.
Use Visible Upgrade.
Turn down dpi scaling from 150% to 149%. Might need reboot (Setting the compatibility option for the game to ignore desktop scaling does not solve this.)[10][11]

Vsync option not working on Windows 10

Use dgVoodoo2
  1. Download dgvoodoo2.
  2. Copy D3D8.DLL from the \MS\x86\ folder to the System folder in the game install directory.

Choppy camera movement

Set Sensitivity to 0 in the control settings

Microstuttering/Low Fps

The game by default only uses a single cpu core, forcing high resolutions and enhanced textures with Visible Upgrade causes the cpu use to the fullest causing stuttering.
Enable multicore mode in Visible Upgrade's advanced settings
If the game begins crashing often, make sure to apply Large Address Aware, and change the CPU affinity for <path-to-game>\System\DeusEx2.exe to only 2 CPU cores, ideally the higher-numbered ones. If it still crashes, try setting the affinity to one core, but one of the higher-numbered cores. Since the game relaunches the executable every time it loads a level, the best way to set CPU affinity is to use a program like Process Hacker to save the CPU affinity settings for DeusEx2.exe for you, so you don't have to change it at every loading screen.


Physics Are Sped Up at High Frame Rate

When running the game at high frame rates, such as 100+, the physics of objects in-game are sped up the higher the frame rate.
Limit the frame rate to 60 FPS
Enable vsync and set refresh rate on 60hz

Other information

API

Technical specs Supported Notes
Direct3D 8
Shader Model support 1.1
Executable 32-bit 64-bit Notes
Windows

Middleware

Middleware Notes
Physics Havok
Audio OpenAL, DirectSound [5]
Cutscenes Bink Video 1.5v

In-game debug/cheat menu

The game has an in-game debug menu that can be enabled to use cheats and other debug commands.
Enable debug menu
  1. If using the Visible Upgrade and Unified Texture Pack, open %PROGRAMDATA%\Deus Ex 2 Visible Upgrade\Installed Mods\Unified Texture Pack\System\DX2UI.ini. Otherwise, open <path-to-game>\System\DX2UI.ini. Find the [DebugMenu] section and replace it with the config below, then save the file (you may also want to set it to read-only to prevent the game from overwriting it):
    
    [DebugMenu]
    Active=ACTIVE
    Type=Menu
    Placement_X=RIGHT
    Placement_Y=BOTTOM
    PauseGame=False
    AutoSizeWidth=True
    AutoSizeHeight=True
    TextColor_R=0
    TextColor_G=180
    TextColor_B=255
    TextColor_A=10
    Color_Normal_R=0
    Color_Normal_B=180
    Color_Normal_G=255
    Color_Normal_A=10
    TextShadowColor_A=0
    SelectedColor_R=0
    SelectedColor_G=180
    SelectedColor_B=255
    SelectedColor_A=10
    UnselectedColor_R=0
    UnselectedColor_G=180
    UnselectedColor_B=255
    UnselectedColor_A=10
    Font=HUD_Inventory
    MenuDefinitionFile=DX2Menu.ini
    ListenForMouseClicks=True
    InputLayerName=DebugMenu
    
  2. If using the Visible Upgrade and Unified Texture Pack, create the file %PROGRAMDATA%\Deus Ex 2 Visible Upgrade\Installed Mods\Unified Texture Pack\System\DX2Menu.ini and open it. Otherwise, open <path-to-game>\System\DX2Menu.ini. Replace the contents of the file with the config below, making sure all the tabs remain tabs and are not replaced by spaces, then save the file (you may also want to set it to read-only to prevent the game from overwriting it):
    
    // DX2 User Menu Configuration File
    
    // "//" comments are acceptable; "/*" - "*/" comments are not.
    
    // To add a submenu: 
    //
    //		[Submenu string text]
    //		{
    //			// submenu contents go here
    //		}
    
    // To add a menu item that executes a console command:
    //
    //		<menu text string, CONSOLE COMMAND TEXT>
    
    // To add a "double menu item":
    //
    //		<menu text 1, CONSOLE COMMAND 1; menu text 2, CONSOLE COMMAND 2>
    
    // Other guidelines:
    // - Commands should always be in ALL CAPS.
    // - Always indent using TABS.
    // - You should separate commands menu text and the command with a COMMA and a SPACE.
    
    [ ]
    {
    	[Diagnostics]
    	{
    		<'EXEC macro.txt', EXEC macro.txt>
    		[Stats...]
    		{
    			<None, PROFILE STATS NONE>
    			<FPS, STAT FPS>
    			<FPS Categories, PROFILE GROUPS>
    			[FPS Category Hotspots...]
    			{
    				<Unlabled, PROFILE HOTSPOTS UNLABELED>
    				<Test, PROFILE HOTSPOTS TEST>
    				<General, PROFILE HOTSPOTS GENERAL>
    				<Rendering, PROFILE HOTSPOTS RENDERING>
    				<Overlays, PROFILE HOTSPOTS OVERLAYS
    				<Object System, PROFILE HOTSPOTS OBJSYS>
    				<Property System, PROFILE HOTSPOTS PROPSYS>
    				<Physics, PROFILE HOTSPOTS PHYSICS>
    				<AI, PROFILE HOTSPOTS AI>
    				<Cadence, PROFILE HOTSPOTS CADENCE>
    				<T3 Game, PROFILE HOTSPOTS T3GAME>
    				<DX2 Game, PROFILE HOTSPOTS DX2GAME>
    				<Attachment, PROFILE HOTSPOTS ATTACHMENT>
    				<Profiling, PROFILE HOTSPOTS PROFILING>
    				<Particles, PROFILE HOTSPOTS PARTICLES>
    				<None, PROFILE HOTSPOTS NONE>
    			}
    			<Physics Summary, STAT PHYSICS>
    			<Rendering Summary, STAT RENDER>
    			<Rendering Full, PROFILE STATS RENDERING>
    			<Texture, PROFILE TEXTURE>
    			<Vertex Pools, PROFILE VERTEXPOOLS>
    			<Physics, STAT PHYSICS>
    			<Havok, STAT HAVOK ALL>
    			<'STAT POSITION', STAT POSITION>
    			<'STAT VERSION', STAT VERSION>
    		}
    
    		[Rendering...]
    		{
    			<Toggle Shadows, SHADOWS>
    			<Toggle Fog, FOG>
    			<Toggle Wireframe, WIREFRAME>
    			<Toggle Portals, DRAWPORTALS>
    			<Toggle Lit Wireframe, LITWIRE>
    			<Toggle Fullbright, FULLBRIGHT>
    			<Toggle Checker, CHECKER>
    			<Toggle Specular, SPECULAR>
    			<Toggle Light Visualization, VISLIGHTS>
    			<Toggle Shadow Visualization, VISSHADOWS>
    			<Toggle Shadow Volumes, SHADOWVOLUMES>
    			<'TOGGLEWORLDRENDER', TOGGLEWORLDRENDER>
    			[Other...]
    			{
    				<Toggle Bounding Boxes, boundingbox>
    				<Toggle Particle Bounding Boxes, particleboundingbox>
    				<Toggle Bullet Lines, BulletLines>
    				<Toggle Bone Coords, BoneCoords>
    				<Toggle Pivot Coords, PivotCoords>	
    				<Toggle Object Info, ObjectInfo>	
    			}
    		}
    
    		[Physics...]
    		{
    			<Start Capturing a Havok Movie, HAVOK CAPTURE ON>
    			<Stop Capturing a Havok Movie, HAVOK CAPTURE OFF>
    			<Show Dynamic Volumes, PHYSICS VOLUMES ON>
    			<Hide Dynamic Volumes, PHYSICS VOLUMES OFF>
    			<Show Static Volumes, PHYSICS STATIC ON>
    			<Hide Static Volumes, PHYSICS STATIC OFF>
    			<Show Character Volumes, PHYSICS CHARACTERS ON>
    			<Hide Character Volumes, PHYSICS CHARACTERS OFF>
    			<Show Ragdoll Volumes, PHYSICS RAGDOLL ON>
    			<Hide Ragdoll Volumes, PHYSICS RAGDOLL OFF>
    		}
    
    		[Reports...]
    		{
    			<Onscreen Content, ALLOC GROUP=CONTENT>
    			<Onscreen Content Off, ALLOC OFF>
    			<Memory Usage, DUMPMEMREPORT>
    			<Memory Usage with group info,DUMPEXTMEMREPORT>
    			<Memory Usage into Excel, DUMPMEMREPORTEXCEL>
    			<Memory Budgets into Excel,DUMPMEMBUDGETSEXCEL>
    			<Dump texture report,DUMPTEXTUREREPORT>
    			<Dump material report,DUMPMATREPORT>
    			<Dump actor report, DUMPACTORREPORT>
    			<Dump bsp report, DUMPBSPREPORT>
    			<Dump static mesh report, DUMPSTATICMESHREPORT>
    			<Dump anim report, DUMPANIMREPORT>
    			<Dump skel report, DUMPSKELREPORT>
    		}
    
    		[Cheats...]
    		{
    			[Cheat Codes...]
    			{
    				<SAVEINVENTORY, SAVEINVENTORY>
    				<LOADINVENTORY, LOADINVENTORY>
    				<Fly,Fly>
    				<Ghost,Ghost>
    				<Walk,Walk>
    				<FPS, STAT FPS>
    				<'GOD PLAYER',GOD PLAYER>
    				<'FULLHEALTH', FULLHEALTH>
    				<'GET CREDITS', GIVECREDITS 9999>
    				<'INFINITEBIOENERGY', INFINITEBIOENERGY>
    				<'FULLBIOENERGY', FULLBIOENERGY>
    				<'INFINITEAMMO', INFINITEAMMO>
    				<'FULLAMMO', FULLAMMO>
    				<'FULLPLASMA', FULLPLASMA>
    				<'FULLMATTER', FULLMATTER>
    				<'OPENSESAME', OPENSESAME>
    				<'ALLBIOMODS', ALLBIOMODS>
    				<'SETBIOMODSLEVEL 3', SETBIOMODSLEVEL 3>
    			}
    			[Player Movement...]
    			{
    				<Fly,Fly>
    				<Ghost,Ghost>
    				<Walk,Walk>
    				<'TELEPORT PLAYER START',TELEPORT PLAYER START>
    			}
    			[Invulnerability...]
    			{
    				<'GOD OFF',GOD OFF>
    				<'GOD PLAYER',GOD PLAYER>
    				<'GOD HALF',GOD HALF>
    				<'GOD AIS',GOD AIS>
    				<'GOD ALL',GOD ALL>
    			}
    			[SimTime...]
    			{
    				[Speed...]
    				{
    					<Full Speed, Simtime Scale 1.0>
    					<Double Speed, Simtime Scale 2.0>
    					<Half Speed, Simtime Scale 0.5>
    					<Quarter Speed, Simtime Scale 0.25>
    					<Tenth Speed, Simtime Scale 0.1>
    				}
    				<Step a Tenth of a Second, Simtime Step 0.1>
    				<Step a Half Second, Simtime Step 0.5>
    				<Step a Full Second, Simtime Step 1>
    				<Pause, Simtime Pause>
    				<UnPause, Simtime UnPause>
    			}
    			[Damage...]
    			{
    				<'HURTME', HurtMe>
    				<'POISONME 3.14', POISONME 3.14>
    				<'BURNME', BURNME>
    				<Drain Player, DrainMe>
    				<Kill Player, Suicide>
    				<Hurt Target, Hurt>
    				<Kill Target, Kill>
    				<Destroy Target, Destroy>
    				<Delete Target, Delete>
    				<'NUKEALL'(Kill Pawns), NUKEALL>
    			}
    			[Debug...]
    			{
    				[DebugFlags...]
    				{
    					<'DEBUGFLAGS', DEBUGFLAGS>
    					<'DEBUGFLAGS M01', DEBUGFLAGS M01>
    					<'DEBUGFLAGS M02', DEBUGFLAGS M02>
    					<'DEBUGFLAGS M03', DEBUGFLAGS M03>
    					<'DEBUGFLAGS M04', DEBUGFLAGS M04>
    					<'DEBUGFLAGS M05', DEBUGFLAGS M05>
    					<'DEBUGFLAGS M06', DEBUGFLAGS M06>
    				}
    				<'OBJECTINFO', OBJECTINFO>
    				<Target Info, Target Info>
    				<'SETFLAG', SETFLAG>
    				<'DUMPINFO', DUMPINFO>
    				<'DUMPLISTENERINFO', DUMPLISTENERINFO>
    				<'FIRE' (force-fire a trigger script), FIRE sampleObjectName__0.sampleScriptName>
    				<'OPENSESAME', OPENSESAME>
    				<'STOPMUSIC', STOPMUSIC>
    				<'FULLHEALTH', FULLHEALTH>
    				<'INFINITEBIOENERGY', INFINITEBIOENERGY>
    				<'FULLBIOENERGY', FULLBIOENERGY>
    			}
    			[Biomods...]
    			{
    				<'ALLBIOMODS', ALLBIOMODS>
    				<AggressiveDefenseDrone, ADDBIOMOD AggressiveDefenseDroneBiomod>
    				<BiotoxAttackDrone, ADDBIOMOD BiotoxAttackDroneBiomod>
    				<BotDomination, ADDBIOMOD BotDominationBiomod>
    				<Cloak, ADDBIOMOD CloakBiomod>
    				<ElectrostaticDischarge, ADDBIOMOD ElectrostaticDischargeBiomod>
    				<HazardDrone, ADDBIOMOD HazardDroneBiomod>
    				<HealthLeechDrone, ADDBIOMOD HealthLeechDroneBiomod>
    				<MoveSilent, ADDBIOMOD MoveSilentBiomod>
    				<NeuralInterface, ADDBIOMOD NeuralInterfaceBiomod>
    				<Regeneration, ADDBIOMOD RegenerationBiomod>
    				<Speed, ADDBIOMOD SpeedBiomod>
    				<SpyDrone, ADDBIOMOD SpyDroneBiomod>
    				<Strength, ADDBIOMOD StrengthBiomod>
    				<ThermalMasking, ADDBIOMOD ThermalMaskingBiomod>
    				<Vision, ADDBIOMOD VisionBiomod>
    				<PurpleLight, ADDBIOMOD PurpleLightBiomod>
    				<'SETBIOMODSLEVEL 1', SETBIOMODSLEVEL 1>
    				<'SETBIOMODSLEVEL 2', SETBIOMODSLEVEL 2>
    				<'SETBIOMODSLEVEL 3', SETBIOMODSLEVEL 3>
    			}
    			[Weapons...]
    			{
    				<'INFINITEAMMO', INFINITEAMMO>
    				<'FULLAMMO', FULLAMMO>
    				<'FULLPLASMA', FULLPLASMA>
    				<'FULLMATTER', FULLMATTER>
    				<'ALLWEAPONS', ALLWEAPONS>
    				<'ALLALWAYSLOAD', ALLALWAYSLOAD>
    				[Weapon Mods...]
    				{
    					<Install Increased Range, installweaponmod IncreasedRange>
    					<Install Silencer, installweaponmod Silencer>
    					<Install EMP Converter, installweaponmod EMPConverter>
    					<Install Fragmentary Round, installweaponmod FragmentaryRound>
    					<Install Glass Destabilizer, installweaponmod GlassDestabilizer>
    					<Install Refire Rate, installweaponmod RefireRate>
    					<Install Tracking Computer, installweaponmod TrackingComputer>
    					<Install Ammo Scavenger, installweaponmod AmmoScavenger>
    				}
    			}
    			[UI...]
    			{
    				<Toggle HUD, HudActive>
    			}		
    		}
    
    		[AI Diagnostics...]
    		{
    			[Cheats...]
    			{
    				[All AIs Blind...]
    				{
    					<ON,+BLIND>
    					<Off,-BLIND>
    				}
    				[All AIs Deaf...]
    				{
    					<ON,+DEAF>
    					<Off,-DEAF>
    				}
    				[All AIs Deaf, Dumb, and Blind...]
    				{
    					<ON,+NOEVIDENCE>
    					<Off,-NOEVIDENCE>
    				}
    				<All AIs Forget,FORGET>
    				<'IGNOREPLAYER',IGNOREPLAYER>
    				[AI Speed...]
    				{
    					<100%,AISPEED 1>
    					<200%,AISPEED 2>
    					<50%,AISPEED 0.5>
    				}
    			}
    			[AI Stats...]
    			{
    				[Enable For AIs...]
    				{
    					<All AIs,AISTATS ALL>
    					<Nearest AI Only,AISTATS NEAREST>
    					<Marked AIs Only,AISTATS MARKED>
    					<Disable,AISTATS Off>
    				}
    				[General...]
    				{
    					[Past Locations...]
    					{
    						<ON,AISTATS +PASTLOCATIONS>
    						<Off,AISTATS -PASTLOCATIONS>
    					}
    					[Sensory...]
    					{
    						[Visual Angles...]
    						{
    							<ON,AISTATS +VISANGLES>
    							<Off,AISTATS -VISANGLES>
    						}
    						[Visual Ranges...]
    						{
    							<ON,AISTATS +VISRANGE>
    							<Off,AISTATS -VISRANGE>
    						}
    						[Audio Ranges...]
    						{
    							<ON,AISTATS +AUDIORANGE>
    							<Off,AISTATS -AUDIORANGE>
    						}
    					}
    					[Anims History...]
    					{
    						<ON,AISTATS +ANIMS>
    						<Off,AISTATS -ANIMS>
    					}
    					[Sounds History...]
    					{
    						<ON,AISTATS +SOUNDS>
    						<Off,AISTATS -SOUNDS>
    					}
    				}
    				[Movement/Pathfinding...]
    				{
    					[Movement Paths...]
    					{
    						<ON,AISTATS +MOVESTATS>
    						<Off,AISTATS -MOVESTATS>
    					}
    					[Local Pathfinding...]
    					{
    						[Local Grid...]
    						{
    							<ON,AISTATS +LOCALGRID>
    							<Off,AISTATS -LOCALGRID>
    						}
    						[Local Grid Costs...]
    						{
    							<ON,AISTATS +LOCALGRIDCOSTS>
    							<Off,AISTATS -LOCALGRIDCOSTS>
    						}
    						[Local Grid Heights...]
    						{
    							<ON,AISTATS +LOCALGRIDHEIGHTS>
    							<Off,AISTATS -LOCALGRIDHEIGHTS>
    						}
    						[Sampling Grid...]
    						{
    							<ON,AISTATS +SAMPLINGGRID>
    							<Off,AISTATS -SAMPLINGGRID>
    						}
    					}
    					[Path-Locking...]
    					{
    						<ON,AISTATS +PATHLOCK>
    						<Off,AISTATS -PATHLOCK>
    					}
    				}
    				[Behavior...]
    				{
    					[Evidence...]
    					{
    						<ON,AISTATS +EVIDENCE>
    						<Off,AISTATS -EVIDENCE>
    					}
    					[Behavior Stats...]
    					{
    						<ON,AISTATS +BEHAVIOR>
    						<Off,AISTATS -BEHAVIOR>
    					}
    				}
    				[Combat...]
    				{
    					[Tactics...]
    					{
    						<ON,AISTATS +TACTICS>
    						<Off,AISTATS -TACTICS>
    					}
    					[Search Grid...]
    					{
    						<ON,AISTATS +SEARCHGRID>
    						<Off,AISTATS -SEARCHGRID>
    					}
    					[Trajectories...]
    					{
    						<ON,AISTATS +TRAJECTORY>
    						<Off,AISTATS -TRAJECTORY>
    					}
    				}
    			}
    			[NavMesh...]
    			{
    				<NavMesh Node-Viewing Mode,NAVMESH SHOW>
    				<NavMesh Link-Viewing Mode,NAVMESH SHOWLINKS>
    				<NavMesh Tag-Viewing Mode,NAVMESH SHOWTAGS>
    				<NavMesh Cover-Point-Viewing Mode,NAVMESH SHOWCOVERPOINTS>
    				<Hide NavMesh,NAVMESH HIDE>
    			}
    			[AI Patrol Paths...]
    			{
    				<Show,AIPATROLS SHOW>
    				<Hide,AIPATROLS HIDE>
    			}
    			[Flock Vectors...]
    			{
    				<Show,+FLOCKVECTORS>
    				<Hide,-FLOCKVECTORS>
    			}
    		}
    		
    		[Sound...]
    		{
    			[Volume Graph (XBOX ONLY)...]
    			{
    				<Show Average Levels,RENDER DIAG ADD SOUNDLEVELS -1>
    				<Show Peak Levels,RENDER DIAG ADD SOUNDLEVELS -2>
    				<Hide All,RENDER DIAG KILL SOUNDLEVELS> 
    			}
    			[Memory...]
    			{
    				<Show Memory Bar,RENDER DIAG ADD SOUNDMEMORYBAR>
    				<Hide Memory Bar,RENDER DIAG KILL SOUNDMEMORYBAR>
    			}
    			[List...]
    			{
    				<Show Playing,RENDER DIAG ADD SOUNDTABLE>
    				<Show All,RENDER DIAG ADD SOUNDTABLE ALL>
    				<Off,RENDER DIAG KILL SOUNDTABLE>
    			}
    			[Portals...]
    			{
    				<On,RENDER DIAG ADD SOUNDPORTALS>
    				<Off,RENDER DIAG KILL SOUNDPORTALS>
    			}
    			[Paths...]
    			{
    				<On,SOUND SHOWPATHS=G>
    				<Off,SOUND SHOWPATHS=N>
    			}
    			[Uncategorized Objects...]
    			{
    				<Show,RENDER DIAG ADD UNCATACTORS>
    				<Hide,RENDER DIAG KILL UNCATACTORS>
    			}
    			[Uncategorized BSP...]
    			{
    				<Show,RENDER DIAG ADD UNCATBSP>
    				<Hide,RENDER DIAG KILL UNCATBSP>
    			}
    			[Physics-Sound...]
    			{
    				<Enable,COLLIDE SOUND ON>
    				<Disable,COLLIDE SOUND OFF>
    				<Show Diagnostics,COLLIDE SOUND DEBUG ON>
    				<Hide Diagnostics,COLLIDE SOUND DEBUG OFF>
    			}
    			[Footsteps...]
    			{
    				<Show Diagnostics,FOOTSTEP DEBUG ON>
    				<Hide Diagnostics,FOOTSTEP DEBUG OFF>
    			}
    		}
    
    		[Playtest logging...]
    		{
    			<I am debugging, METRICS START DEBUG>
    			<I am playtesting, METRICS START PLAYTEST>
    			<End recording, METRICS END>
    		}
    
    		[Misc...]
    		{
    			[Colors...]
    			{
    				<Increment Brightness,BRIGHTNESS +>
    				<Increment Contrast,CONTRAST +>
    				<Increment Gamma,GAMMA +>
    			}
    			[Input Select...]
    			{
    				<Controller 1,Load Controller CLASS=Input DATA=ini:Engine.Engine.Input>
    				<Controller 2,Load Controller CLASS=DX2InputController1 DATA=ini:Engine.Engine.Input2>
    			}
    			[Player...]
    			{
    				<Toggle Player Arm Release, ReleaseArms>
    				<(Broken) Toggle Target Info, TargetInfo>
    				<Toggle Object Info, ObjectInfo>
    				<Kill Player, Suicide>
    				<Hurt Player, HurtMe>
    				<Drain Player BE, DrainMe>
    				<Hurt Target, Hurt>
    				<Kill Target, Kill>
    				<Destroy Target, Destroy>
    			}
    			[Animation...]
    			{
    				<Toggle Animation Info, Animinfo>
    				<Toggle Attach Info, Attachinfo>
    			}
    			[Properties...]
    			{
    				<Dump Access Statistics, Obj HashStats>
    				<Clear Access Statistics, Obj HashStatsClear>
    				<Toggle Per-Frame Stat Dump, Obj HashStatsEveryFrame>
    			}
    		}
    
    		[Low-Level...]
    		{
    			[Profiling...]
    			{
    				<Off, Profile Off>
    				<Detailed, Profile All>
    				[Minimum framerate logging...]
    				{
    					<Less than 30fps, PROFILE MAX 33>
    					<Less than 25fps, PROFILE MAX 40>
    					<Less than 20fps, PROFILE MAX 50>
    					<Less than 15fps, PROFILE MAX 66>
    					<Less than 10fps, PROFILE MAX 100>
    				}
    				[Expand and Collapse...]
    				{
    					<Expand 1, PROFILE 1>
    					<Expand 2, PROFILE 2>
    					<Expand 3, PROFILE 3>
    					<Expand 4, PROFILE 4>
    					<Expand 5, PROFILE 5>
    					<Expand 6, PROFILE 6>
    					<Expand 7, PROFILE 7>
    					<Expand 8, PROFILE 8>
    					<Expand 9, PROFILE 9>
    					<Collapse, PROFILE 0>
    				}
    				[Disable and Enable Code...]
    				{
    					<Toggle 1, SCALPEL 1>
    					<Toggle 2, SCALPEL 2>
    					<Toggle 3, SCALPEL 3>
    					<Toggle 4, SCALPEL 4>
    					<Toggle 5, SCALPEL 5>
    					<Toggle 6, SCALPEL 6>
    					<Toggle 7, SCALPEL 7>
    					<Toggle 8, SCALPEL 8>
    					<Toggle 9, SCALPEL 9>
    				}
    				[Detailed Filter...]
    				{
    					<Show All, PROFILE FILTER ALL>
    					<Show None,Profile Filter None>
    					<Unlabled,Profile Filter Unlabled>
    					<Test,Profile Filter Test>
    					<General,Profile Filter General>
    					<Rendering,Profile Filter Rendering>
    					<Object System,Profile Filter ObjSys>
    					<Property System,Profile Filter PropSys>
    					<Physics,Profile Filter Physics>
    					<AI,Profile Filter AI>
    					<Cadence,Profile Filter Cadence>
    					<Attachment,Profile Filter Attachment>
    					<T3 Game,Profile Filter T3Game>
    				}
    				<Window 1, Profile Window 1>
    				<Window 16, Profile Window 16>
    				<Window 128, Profile Window 128>
    				<Disable, PROFILE DISABLE>
    				<Enable, PROFILE ENABLE>
    				<D3DPerf, Profile D3DPerf>
    			}
    
    			[Parallel Timing...]
    			{
    				<Show Snapshot, Profile PT Show>
    				<Hide, Profile PT Hide>
    				<Select Next, Profile PT Next>
    				<Select Previous, Profile PT Prev>
    				<Zoom In, Profile PT Zoom 100>
    				<Zoom Out, Profile PT Zoom -100>
    				<UnZoom, Profile PT NoZoom>
    				<Scroll Up, Profile PT Scroll -75>
    				<Scroll Down, Profile PT Scroll 75>
    			}
    			
    			[Allocation...]
    			{
    				<All, ALLOC ALL>
    				<Off, ALLOC OFF>
    				[Subsystems...]
    				{
    					<Renderer, ALLOC RENDERER>
    					<AI-NavMesh, ALLOC AINAVMESH>
    					<AI-Runtime, ALLOC AIRUNTIME>
    					<Objects, ALLOC OBJECTS>
    					<BSP Tree, ALLOC BSPTREE>
    					<Engine, ALLOC ENGINE>
    					<Editor, ALLOC EDITOR>
    					<Physics, ALLOC PHYSICS>
    					<Sound, ALLOC SOUND>
    					<Animation, ALLOC ANIMATION>
    					<Scripts, ALLOC SCRIPTS>
    					<Conversation, ALLOC CONVERSATIONS>
    				}
    				[Subsystems (Low-level)...]
    				{
    					<Strings, ALLOC STRING>
    					<Tags, ALLOC CTAG>
    					<Properties, ALLOC PROPERTIES>
    					<Input, ALLOC INPUT>
    					<File, ALLOC FILE>
    					<Utility, ALLOC UTILITY>
    					<Misc, ALLOC MISC>
    					<Warfare, ALLOC WARFARE>
    					<UnEditSupt, ALLOC UNEDITSUPT>
    				}
    				[Subsystems (Internal)...]
    				{
    					<UCache, ALLOC UCACHE>
    					<DArray, ALLOC DARRAY>
    					<UArray, ALLOC UARRAY>
    					<Unclaimed, ALLOC UNCLAIMED>
    					<Internal, ALLOC INTERNAL>
    				}
    			}
    		}
    
    		[Unit Tests...]
    		{
    			[Cadence Unit Tests...]
    			{
    				<Run Automatic Tests,UNITTEST CADENCE>
    				<Run Manual & Automatic Tests,UNITTEST CADENCE SEMIAUTOMATIC>
    			}
    			[Flesh Unit Tests...]
    			{
    				<Run Automatic Tests,UNITTEST FLESH>
    				<Run Manual & Automatic Tests,UNITTEST FLESH SEMIAUTOMATIC>
    			}
    			[Engine Unit Tests...]
    			{
    				<Run Automatic Tests,UNITTEST ENGINE>
    				<Run Manual & Automatic Tests,UNITTEST ENGINE SEMIAUTOMATIC>
    			}
    			<Run All Automatic Tests,UNITTEST ALL>
    			<Run All Manual & Automatic Tests,UNITTEST ALL SEMIAUTOMATIC>
    		}
    
    		[Autosave...]
    		{
    			<Restart from Last, AUTOSAVERUN>
    			<Update Autosave, AUTOSAVEMAP>
    		}
    
    		[Quit...]
    		{
    			<Yes,EXIT>
    			<No, >
    		}
    	}
    }
    
    
  3. Launch the game and the Debug Menu should be available in the lower right corner.

Notes

The menu should blend in with the game's UI, displaying "Diagnostics" when closed.
To use the menu, pause the game, and click on the "Diagnostics" button, then click on whatever debug commands/categories you want to use. To close the menu, unpause the game, and press the Backspace key until the menu is replaced with the "Diagnostics" button.
You can use the debug menu to spawn items in-game, by doing the following:
  1. Create and open the file %USERPROFILE%\Documents\Deus Ex - Invisible War\inventoryfile.txt. If you prefer, you can use the debug menu's Cheats > Cheat Codes > SAVEINVENTORY command to autogenerate an example inventoryfile.txt for you.
  2. For each item you want to spawn, add a new line in the format CLASS=<itemname>, replacing <itemname> with the name of the item you want to spawn. You can use the same one multiple times to spawn multiple copies of the same item. A list of item names is below.[12]
    Weapons:
    	Baton
    	BoltCaster
    	CombatKnife
    	Crowbar
    	EnergyBlade
    	FlameThrower
    	MakoPistol
    	RailGun
    	RocketLauncher
    	Shotgun
    	SMG
    	SniperRifle
    	StunProd
    Throwables:
    	ConcussionGrenade
    	ConcussionProxMine
    	Flashbomb
    	GasGrenade
    	EMPGrenade
    	EMPProxMine
    	ScramblerGrenade
    	ScramblerProxMine
    	Spiderbomb
    Bio-Mod Canisters:
    	BiomodCanister
    	BlackMarketBiomodCanister
    Misc. Items:
    	Medkit
    	EnergyCell
    	Multitool
    	Binoculars
    	FireExtinguisher
    	WineBottle
    	BeerBottle
    	Noisemaker
    	EnergyCell
    	Flare
    	CandyBar
    	SodaCan
    	SoyPacket
    	Bread
    	Cigarettes
    Weapon Mods:
    	FragmentaryRound
    	EMPConverter
    	GlassDestabilizer
    	Silencer
    	IncreasedRange
    	RefireRate
    	AmmoScavenger
    	IncreasedDamage
    
  3. To spawn the items, select Cheats > Cheat Codes > LOADINVENTORY in the debug menu. You can also modify the inventoryfile.txt file while the game is running to spawn different items at different times. If spawned items aren't usable, try dropping them and picking them back up.

System requirements

Windows
Minimum Recommended
Operating system (OS) 98 SE
Processor (CPU) Intel Pentium III 1.3 GHz
AMD Athlon XP 1300+
System memory (RAM) 256 MB
Hard disk drive (HDD) 2 GB
Video card (GPU) 32 MB of VRAM
DirectX 9 compatible
Shader model 1.1 support
Supported Video Chipsets: nVidia GeForce 3Ti/4Ti/FX - Note: GeForce MX series is NOT SUPPORTED. ATI Radeon 8500/9xxx or higher.


Notes

  1. 1.0 1.1 File/folder structure within this directory reflects the path(s) listed for Windows and/or Steam game data (use Wine regedit to access Windows registry paths). Games with Steam Cloud support may store data in ~/.steam/steam/userdata/<user-id>/6920/ in addition to or instead of this directory. The app ID (6920) may differ in some cases. Treat backslashes as forward slashes. See the glossary page for details.

References