Wolfenstein: The New Order
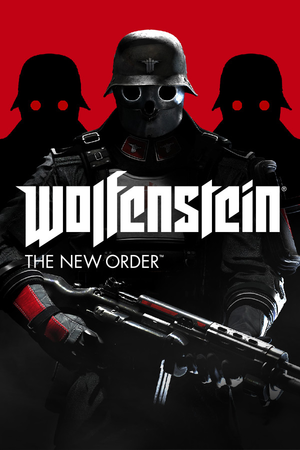 |
|
| Developers | |
|---|---|
| MachineGames | |
| Publishers | |
| Bethesda Softworks | |
| Engines | |
| id Tech 5 | |
| Release dates | |
| Windows | May 20, 2014 |
| ⤏ Go to series page | |
| Castle Wolfenstein | 1981 |
| Beyond Castle Wolfenstein | 1984 |
| Wolfenstein 3D | 1992 |
| Spear of Destiny | 1992 |
| Return to Castle Wolfenstein | 2001 |
| Wolfenstein: Enemy Territory | 2003 |
| Wolfenstein | 2009 |
| Wolfram (unofficial game) | 2012 |
| Wolfenstein: The New Order | 2014 |
| Wolfenstein: The Old Blood | 2015 |
| Wolfenstein II: The New Colossus | 2017 |
| Wolfenstein: Youngblood | 2019 |
| Wolfenstein: Cyberpilot | 2019 |
| RealRTCW (unofficial mod) | 2020 |
Key points
- Use id5 Tweaker to change advanced settings and optimize performance.
General information
- PC Report
- Official Wolfenstein series site
- Wolfenstein Wiki - A detailed wiki for every Wolfenstein game made.
- Steam Community Discussions
- Steam Community Discussions (German Edition)
Availability
| Source | DRM | Notes | Keys | OS |
|---|---|---|---|---|
| Retail | Released along with The Old Blood in a two-pack. | |||
| Amazon.com | ||||
| Bethesda.net | ||||
| GamersGate | ||||
| Green Man Gaming | ||||
| Humble Store | ||||
| Steam |
Version differences
- The German Edition (aka LV Release) only includes the German language and has content differences (e.g. no swastikas).
- The Panzerhund Edition does not include the game or any in-game extras.[1]
Essential improvements
Restore cache files
- The texture cache folder is not made by the game so the cache is regenerated for each session.
- This can fix stuttering in the game.
| Make texture cache folder[2] |
|---|
Notes
|
Skip intro videos
Use +com_skipIntroVideo 1 command line argument[3]
|
|---|
| Rename the video files |
|---|
|
Game data
Configuration file(s) location
| System | Location |
|---|---|
| Windows | %USERPROFILE%\Saved Games\MachineGames\Wolfenstein The New Order\base\wolfConfig.cfg |
| Steam Play (Linux) | <SteamLibrary-folder>/steamapps/compatdata/201810/pfx/[Note 1] |
Save game data location
| System | Location |
|---|---|
| Windows | %USERPROFILE%\Saved Games\MachineGames\Wolfenstein The New Order\base\savegame\ |
| Steam Play (Linux) | <SteamLibrary-folder>/steamapps/compatdata/201810/pfx/[Note 1] |
Save game cloud syncing
| System | Native | Notes |
|---|---|---|
| Steam Cloud |
Video settings
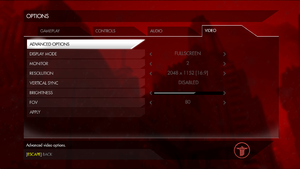
Field of view (FOV)
- id5 Tweaker increases the upper limit of the FOV to 200 and allows changing the FOV of the hands and weapons.
| Adjust FOV values[4] |
|---|
|
Vertical sync (Vsync)
- The in-game Vsync option may not work correctly if used in conjunction with G-sync, and/or if using the unofficial high frame rate mod.
| Alternative Vsync[citation needed] |
|---|
Notes
|
High frame rate
| Increase FPS cap[4] |
|---|
Notes
|
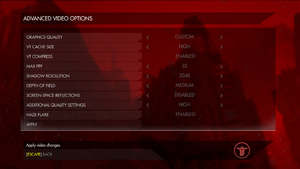
Post-processing
| Disable depth of field[3][4] |
|---|
or
|
| Disable all post process effects[4] |
|---|
|
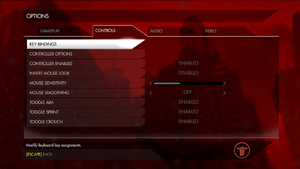
Input settings
- Some useful console commands would be
listBinds,unbindin order to force certain keys to be unbound andunbindAll
Binding keys through the console
| Instructions[citation needed] |
|---|
Notes
|
Binding keys by editing configuration files
| Instructions[5] |
|---|
Notes
|
Audio settings
Localizations
| Language | UI | Audio | Sub | Notes |
|---|---|---|---|---|
| English | ||||
| French | ||||
| German | German Edition only. | |||
| Hungarian | Fan translation. | |||
| Italian | ||||
| Japanese | ||||
| Polish | ||||
| Russian | ||||
| Spanish |
VR support
| 3D modes | State | Notes | |
|---|---|---|---|
| Native 3D | |||
| Nvidia 3D Vision | Use 3D Surround Gaming fix. | ||
| TriDef 3D | |||
| iZ3D | |||
| Devices | |||
|---|---|---|---|
| 3RD Space Gaming Vest | |||
Issues fixed
Vertical sync disables itself intermittently
| Force Vsync and triple buffering[4] |
|---|
Notes
|
"Wolfenstein is not responding" crash
- The game may crash soon after starting when using outdated graphics card drivers.
| Install recommended graphics card drivers[6][7] |
|---|
|
Low frame rate
| Change binary name and create text file[8] |
|---|
|
Solution presumably for AMD GPUs
Do not delete the WolfNewOrder_x32 file or else it won't work. Make sure that the two laucnh files are in the game folder, WolfNewOrder_x64.exe and WolfNewOrder_x32.exe. Steamless binary achieves few FPS more. Keep Steam in offline mode. No Internet connection. |
| Set specific level of certain details[9] |
|---|
|
| Force the game to use copied AMD OpenGL driver (atioglxx.dll)[11] |
|---|
|
Search for atioglxx.dll inside Windows folder, or use this one. Then copy the file inside the game folder.
|
Endless loading screen
| Verify the cache integrity on Steam[citation needed] |
|---|
|
Game crashes to desktop on random intervals on AMD graphics cards
- There is an issue where Catalyst AI causes the crashes. In older drivers this could be turned off in the software, but now it must be done manually.
| Disable Catalyst AI[12] |
|---|
Notes
|
Displayed game exceeds range of visibility on the screen
| Disable DPI scalling in Windows |
|---|
|
Game runs slow in multithreaded mode
| Change amount of threads in game renderer |
|---|
|
Stutter, textures pop-in, freezes on 3GB VRAM cards
| Increase texture buffer[13] |
|---|
Notes
|
| Minifreezes[citation needed] |
|---|
|
Other information
API
| Technical specs | Supported | Notes |
|---|---|---|
| OpenGL | 3.2 |
| Executable | 32-bit | 64-bit | Notes |
|---|---|---|---|
| Windows |
Middleware
| Middleware | Notes | |
|---|---|---|
| Cutscenes | Bink Video |
Disable camera sway
| Instructions[citation needed] |
|---|
Notes
|
System requirements
| Windows | ||
|---|---|---|
| Minimum | ||
| Operating system (OS) | 7, 8 | |
| Processor (CPU) | Intel Core i7 AMD equivalent |
|
| System memory (RAM) | 4 GB | |
| Hard disk drive (HDD) | 50 GB | |
| Video card (GPU) | Nvidia GeForce GTX 460 ATI Radeon HD 6850 |
|
- Requires a 64-bit system.
Notes
- ↑ 1.0 1.1 Notes regarding Steam Play (Linux) data:
- File/folder structure within this directory reflects the path(s) listed for Windows and/or Steam game data.
- Use Wine's registry editor to access any Windows registry paths.
- The app ID (201810) may differ in some cases.
- Treat backslashes as forward slashes.
- See the glossary page for details on Windows data paths.
References
- ↑ Kotaku - $100 Wolfenstein Panzerhound Edition Comes With A Sweet Dog, No Game
- ↑ Texture Cache Directory: Needs to be created :: Wolfenstein: The New Order General Discussions
- ↑ 3.0 3.1 Verified by User:Rose on 2018-07-19
- ↑ 4.0 4.1 4.2 4.3 4.4 Verified by User:Keith on 2017-11-30
- ↑ ESDF Key Bindings and Chapter 10 Tunnel Glider - Steam Community
- ↑ Wolfenstein: The New Order PC Support - PC - Bethesda Softworks Forums
- ↑ "Wolfenstein is not responding" :: Wolfenstein: The New Order General Discussions
- ↑ How to fix Wolfenstein: The Old blood game launch
- ↑ Performance fixes for 60 FPS gameplay game launch
- ↑ https://steamcommunity.com/app/201810/discussions/0/490121928356626281/
- ↑ Fix borrowed from RAGE (same engine)
- ↑ Wolfenstein: The New Order keeps Crashing to Desktop : Reddit Gamesupport
- ↑ RAGE Wiki - Tweaks

